Tools, Garden & DIY
Electric Cycle Kaise Banaye: DIY E-Bike Conversion Guide
Learn how to convert a standard bicycle into an electric cycle with a DIY kit. This guide covers motor types, battery selection, and a step-by-step installation process.
Building an electric cycle from your existing bicycle is a practical DIY project that involves installing a conversion kit. This guide walks you through selecting the right components and the step-by-step process to transform your regular bike into an e-bike.
Key takeaways:
- A complete e-bike conversion kit typically costs $300 to $800, excluding the bicycle.
- Hub motors are generally easier to install for DIY projects than mid-drive motors.
- Most conversions take 4 to 8 hours using common hand tools.
- Battery capacity (measured in Ah) directly impacts the range of your electric cycle.
What exactly do I need to build an electric cycle?
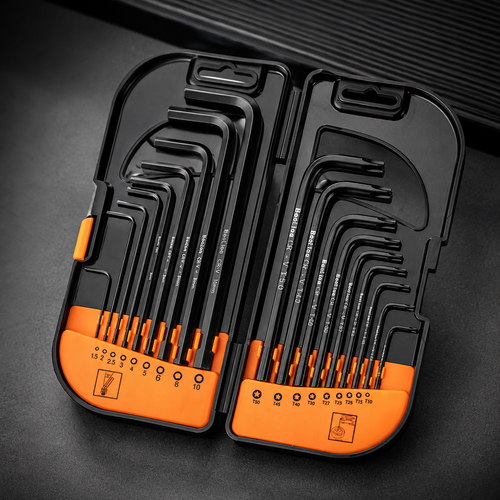
To build an electric cycle, you'll need a complete electric bike conversion kit. These kits usually include a motor, a battery, a controller, a throttle or pedal-assist sensor, and all necessary wiring. You'll also need your existing bicycle, of course. For tools, you'll want a wrench set, screwdrivers, zip ties, and possibly a bike stand.
What kind of conversion kit should I pick?
Choosing the right conversion kit depends on your budget, desired power, and installation difficulty. The main decision is between a hub motor kit and a mid-drive motor kit.
Hub Motor Kits: Hub motors replace one of your bicycle's wheels. They are simpler to install because you just swap out a wheel. They're good for flat terrain and casual riding. Most kits come with either a front or rear wheel already laced with the motor. A typical 36V 250W hub motor kit might cost around $350 to $500.
Mid-Drive Motor Kits: Mid-drive motors mount near your bike's bottom bracket, driving the crankset. They offer better power transfer, especially for climbing hills, and often integrate more smoothly with your bike's gears. However, they are more complex to install, sometimes requiring specialized tools. A 48V 750W mid-drive kit can easily run $600 to $850.
Here's a quick comparison:
| Feature | Hub Motor Kit | Mid-Drive Motor Kit |
|---|---|---|
| Installation | Easier, replaces a wheel | More complex, mounts at crank |
| Cost Range | $350 - $500 (e.g., 36V 250W) | $600 - $850 (e.g., 48V 750W) |
| Performance | Good for flats, basic assist | Excellent for hills, better torque |
| Weight Balance | Can be wheel-heavy | Centralized weight, better balance |
| Compatibility | Fits most bikes (wheel size) | May require specific frame clearances |
For a first-time DIY builder, a hub motor kit is often the more straightforward option.
How do I choose the right battery?
The battery is crucial because it dictates your range and power. Look at voltage (V) and amp-hours (Ah). Common voltages are 36V and 48V. Higher voltage generally means more power. Amp-hours (Ah) determine capacity; a higher Ah rating means more range.
For example, a 36V 10Ah battery might give you 25 to 40 kilometers of range on a single charge, depending on terrain and how much you pedal. A 48V 15Ah battery could push that to 50 to 80 kilometers. Batteries are often the most expensive component, sometimes costing half the price of the entire kit. Always choose a battery from a reputable supplier to ensure safety and longevity. Many kits come with a battery, but some let you buy it separately.
Step-by-step: How to convert your cycle to electric
This process generally takes 4 to 8 hours depending on your skill level and the specific kit.
Step 1: Prepare Your Bicycle First, clean your bicycle thoroughly. Remove the wheel that will be replaced by the motor wheel (front for a front hub motor, rear for a rear hub motor). If you're using a mid-drive kit, remove the cranks and bottom bracket. Lay out all your kit components and tools to ensure everything is present.
Step 2: Install the Motor
- For Hub Motor: Simply replace your existing wheel with the new motor wheel. Ensure it's securely seated in the dropouts. Tighten the axle nuts firmly. If it's a rear wheel, transfer your cassette or freewheel to the new motor wheel first.
- For Mid-Drive Motor: Follow the kit's specific instructions. This usually involves mounting the motor unit to your bike's bottom bracket shell, then reattaching your cranks and chainring to the motor's spindle. This step can be the most mechanically intensive.
Step 3: Mount the Battery Most e-bike batteries come with a mounting plate. Typically, this plate attaches to the water bottle cage mounts on your bike's down tube. Secure the plate firmly with screws, then slide the battery onto the plate until it locks in place. Make sure the battery is easily removable for charging or security. Some kits include a rear rack with an integrated battery.
Step 4: Install the Controller The controller is the "brain" of your e-bike. Many modern kits have the controller integrated into the battery casing or the motor itself. If it's a separate unit, find a secure, dry spot on your frame, often near the battery or under the seat. Use zip ties or the provided straps to fasten it. Ensure cables can reach it easily.
Step 5: Install the Throttle and/or Pedal-Assist Sensor (PAS)
- Throttle: If your kit includes a thumb or twist throttle, install it on your handlebars. Replace your existing grip if necessary.
- PAS Sensor: The pedal-assist sensor usually mounts near your bottom bracket. It detects when you're pedaling and tells the motor to provide assistance. This often involves attaching a magnetic disc to your crank arm and a sensor unit to the frame. Ensure the magnets pass close to the sensor without touching.
Step 6: Wiring Everything Up This is where it all connects. Most modern kits use "plug and play" waterproof connectors, making it relatively straightforward.
- Connect the motor cable to the controller.
- Connect the battery cable to the controller.
- Connect the throttle and/or PAS sensor to the controller.
- If your kit includes brake levers with cutoff switches (recommended for safety), replace your existing brake levers and connect them to the controller. These cut power to the motor when you brake.
- Connect the display unit (if present) to the controller.
- Tidy up all the cables using zip ties. Route them along the frame neatly, ensuring they don't interfere with steering or moving parts.
Step 7: Final Checks and First Ride Before your first ride, double-check all connections. Ensure the motor wheel spins freely and the brakes work perfectly. Turn on the battery and the display. Test the throttle gently or pedal to engage the PAS. Start in a low-assist mode in a safe, open area. Get a feel for the power before riding in traffic.
What are some common mistakes to avoid?
One common mistake is not properly securing the battery. A loose battery can be dangerous and damage connections. Another is neglecting to tidy up cables; loose wires can snag or get caught in moving parts. Also, make sure your bicycle's frame is strong enough to handle the added weight and speed. A lightweight road bike might not be ideal for a powerful e-bike conversion. Always wear a helmet when riding.
Is it worth converting my cycle to electric?
Honestly, for many people, yes, it's absolutely worth it. A DIY conversion can be significantly cheaper than buying a new, pre-built electric bicycle. You get to keep your favorite bike frame, and you gain valuable mechanical and electrical knowledge. A new entry-level e-bike might start at $1000, while a good conversion kit can be half that price. The downside is the time and effort involved, plus you're responsible for any troubleshooting. But if you enjoy tinkering, it's a rewarding project.
Written by
Arthur
Tools, Garden & DIY, MaviGadget
Arthur writes for the MaviGadget Journal, testing the gadgets that promise to change your day and reporting honestly on the ones that actually do.