Tools, Garden & DIY
Cycle Kaise Banaen: A Step-by-Step Guide to Assembling a Bicycle
Assembling a bicycle from a box involves attaching key components like the handlebars, front wheel, pedals, and seat. This guide breaks down the process into manageable steps for a smooth build.
Assembling a bicycle from its box is a straightforward process that typically takes 30 to 60 minutes. You'll attach the handlebars, front wheel, pedals, and seat post, then make final adjustments for safety and comfort.
Key takeaways:
- Most new bikes need assembly of handlebars, front wheel, pedals, and seat.
- Essential tools include Allen wrenches, a pedal wrench, and a Phillips screwdriver.
- Always check pedal threading (L for left, R for right) to avoid damage.
- Inflate tires to the recommended PSI before riding.
What tools do you need to assemble a bicycle?
You'll need a few common tools to put together most new bicycles. The exact set can vary slightly by bike model, but these are the main ones:
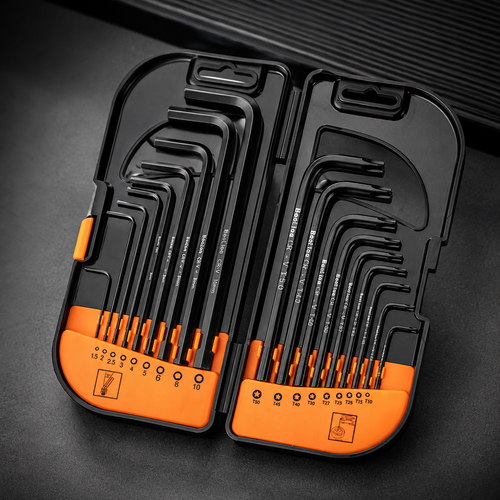
- Allen wrench set: Typically 4mm, 5mm, and 6mm are the most used sizes for bolts on the stem, seat post, and sometimes brakes.
- Pedal wrench: A 15mm open-end wrench is ideal for pedals, though some pedals can use an 8mm Allen wrench.
- Phillips head screwdriver: For minor adjustments, often on fender mounts or reflectors.
- Wire cutters: Useful for snipping zip ties that secure packaging.
- Tire pump: To inflate tires to the correct pressure after assembly.
Sometimes, a torque wrench is useful for ensuring bolts are tightened to manufacturer specifications, preventing damage or loosening. Check your bike's manual for specific torque values.
How do you prepare for assembly?
Before you start building, lay out all the parts and tools in a clear, organized space. This step helps ensure you don't miss anything and makes the assembly process smoother.
- Unbox everything carefully: Use wire cutters to snip any zip ties securing parts. Avoid cutting into cables or paint.
- Remove all packaging: Take off bubble wrap, foam, and cardboard protectors from the frame and components.
- Identify all components: Make sure you have the frame, front wheel, handlebars, seat post with saddle, pedals, and any accessories like reflectors or a kickstand. Check against the parts list in your bike's manual.
- Gather your tools: Have your Allen wrenches, pedal wrench, screwdriver, and tire pump within easy reach.
This preparation usually takes about 10 minutes and can prevent frustration later on.
Step 1: Install the front wheel
Attaching the front wheel is often the first major step. This involves aligning the wheel with the fork and securing it properly.
- Orient the fork: Make sure the fork is facing forward. The brake calipers (if disc brakes) or brake arms (if rim brakes) should be in front of the fork legs.
- Remove the plastic fork protector: This piece keeps the fork from getting damaged during shipping.
- Insert the wheel: Align the wheel's axle with the dropouts at the bottom of the fork. Ensure the brake rotor (for disc brakes) slides into the caliper, or the rim sits correctly between the rim brake pads.
-
Secure the wheel:
- Quick release: Open the quick-release lever, push the wheel fully into the dropouts, then close the lever firmly. It should leave an imprint on your palm.
- Bolt-on: Thread the axle nuts onto the axle ends and tighten them evenly with your wrench, usually a 15mm.
- Thru-axle: Slide the thru-axle through the fork and wheel hub, then tighten it according to the manufacturer's instructions.
Ensure the wheel spins freely without rubbing against the brake pads or fork.
Step 2: Attach the handlebars
The handlebars connect to the stem, which then connects to the steerer tube of the fork. This step is crucial for steering control.
- Locate the stem: The stem is usually already attached to the bike's steerer tube. If not, slide it over the steerer tube and tighten the pinch bolts (usually two, on the side of the stem) with an Allen wrench.
- Remove the faceplate: Unscrew the bolts on the front of the stem (usually four bolts) to remove the faceplate.
- Position the handlebars: Place the handlebars into the cradle of the stem. Ensure they are centered and the brake levers and shifters are in a comfortable position.
- Reattach the faceplate: Put the faceplate back on and thread the bolts in. Tighten the bolts gradually and evenly in a cross pattern (like tightening lug nuts on a car wheel). This ensures even pressure.
- Align and tighten: Stand over the bike and align the handlebars squarely with the front wheel. Once aligned, tighten the stem's pinch bolts (the ones that clamp the stem to the steerer tube) firmly with an Allen wrench, typically a 5mm or 6mm.
A common mistake is overtightening one bolt before others, which can warp the faceplate or damage the handlebars.
Step 3: Install the seat post and saddle
The seat post and saddle are usually pre-assembled. You just need to insert them into the frame and adjust the height.
- Find the seat tube: This is the vertical tube in the bike frame.
- Insert the seat post: Slide the seat post, with the saddle attached, into the seat tube.
- Adjust initial height: For a rough starting point, set the saddle height so your heel can just touch the pedal when your leg is fully extended at the bottom of the pedal stroke.
- Secure the seat post: Tighten the seat post clamp. This can be a quick-release lever or a bolt (usually 5mm or 6mm Allen wrench). Make sure the saddle is level and pointing straight forward.
Do not exceed the minimum insertion line marked on the seat post. This line ensures enough of the post is inside the frame for safety.
Step 4: Attach the pedals
Pedals are often the trickiest part for new assemblers because of their unique threading. Remember: Left pedal (L) is reverse-threaded; Right pedal (R) is standard-threaded.
- Identify pedals: Look for 'L' and 'R' markings on the pedal axles.
- Apply grease (optional but recommended): A thin layer of grease on the pedal threads can prevent seizing and make future removal easier.
- Install the right pedal (R): Thread the right pedal into the crank arm on the drive side (the side with the chain). Turn it clockwise by hand first to avoid cross-threading. Once it's finger-tight, use your pedal wrench (15mm) or Allen wrench to tighten it firmly.
- Install the left pedal (L): Thread the left pedal into the crank arm on the non-drive side. Turn it counter-clockwise by hand first. Once finger-tight, use your pedal wrench or Allen wrench to tighten it firmly.
Cross-threading pedals is a common and damaging mistake. Always start by hand to feel the threads engage correctly.
Step 5: Make final adjustments and safety checks
Once all major components are attached, it's time for crucial adjustments and safety checks before your first ride.
- Inflate tires: Check the sidewall of your tires for the recommended PSI (pounds per square inch) range. Use your tire pump to inflate them to the middle or upper end of this range. For example, a road bike tire might need 80-120 PSI, while a mountain bike tire might need 30-50 PSI.
- Check brakes: Squeeze both brake levers. The brakes should engage firmly without the levers touching the handlebars. Adjust cable tension if needed, usually by turning a barrel adjuster near the lever or caliper.
- Check quick releases and bolts: Double-check that all quick-release levers (wheels, seat post) are closed securely and all bolts (stem, handlebars, seat post clamp, pedals) are tight.
- Adjust saddle height and angle: Fine-tune the saddle height for comfortable pedaling, and ensure it's level.
- Test ride: Take a short, slow ride in a safe area to check steering, braking, and gear shifting. Listen for any unusual noises.
A properly assembled bike is safe and enjoyable to ride. If you feel unsure about any step, especially brakes or gears, it's worth having a professional bike mechanic take a look. They can perform a comprehensive safety check for a small fee.
Written by
Cloe
Tools, Garden & DIY, MaviGadget
Cloe writes for the MaviGadget Journal, testing the gadgets that promise to change your day and reporting honestly on the ones that actually do.