Tech & Gadgets
Underrated AI Tools That Instantly Improve Your Photos

Ask someone to name an AI photo tool and you get the same three answers. Photoshop's generative fill. Lightroom presets. Maybe Canva, if they don't edit much. Fair enough, those are the tools with marketing budgets. But look at the photo actually sitting in your camera roll right now. Slightly out of focus. Fine as a thumbnail, mush the second you zoom in. That photo doesn't need Photoshop. It needs one small, unglamorous tool built to fix exactly that one thing. If the problem is specifically a resolution too low to print or crop, a free image upscaler made for that single job gets you there faster than opening a full editing suite and hunting through menus you don't need. Nothing below shows up in the glossy "best AI apps of the year" roundups. These tools just quietly fix what the big-name editors handle badly.
Fixing the Blur Nobody Talks About

Blur gets treated like one problem. It's really three. Motion blur happens when whatever you're shooting moves faster than the shutter can freeze it. Focus blur happens when the camera locks onto the wrong point, background instead of face, the table instead of the plate. Then there's the soft, waxy blur that creeps in after a photo gets compressed and re-shared a few times across group chats, losing a sliver of quality on every trip. Drop that photo into a general editor and you'll get one blunt tool for all three problems: a sharpening slider that adds crunchy noise around edges instead of recovering anything that's genuinely missing.
Purpose-built unblur tools don't work that way. They're trained to tell crisp texture apart from soft texture, hair strands and fabric weave should stay sharp, skin and sky should stay smooth, and they only sharpen where it actually belongs. Run an old scanned photo through one, or a portrait that came out just a little soft, and the difference from a manual sharpen slider shows up almost immediately. One upload beats twenty minutes of nudging sliders back and forth and still not liking the result.
Getting More Pixels Without the Mush
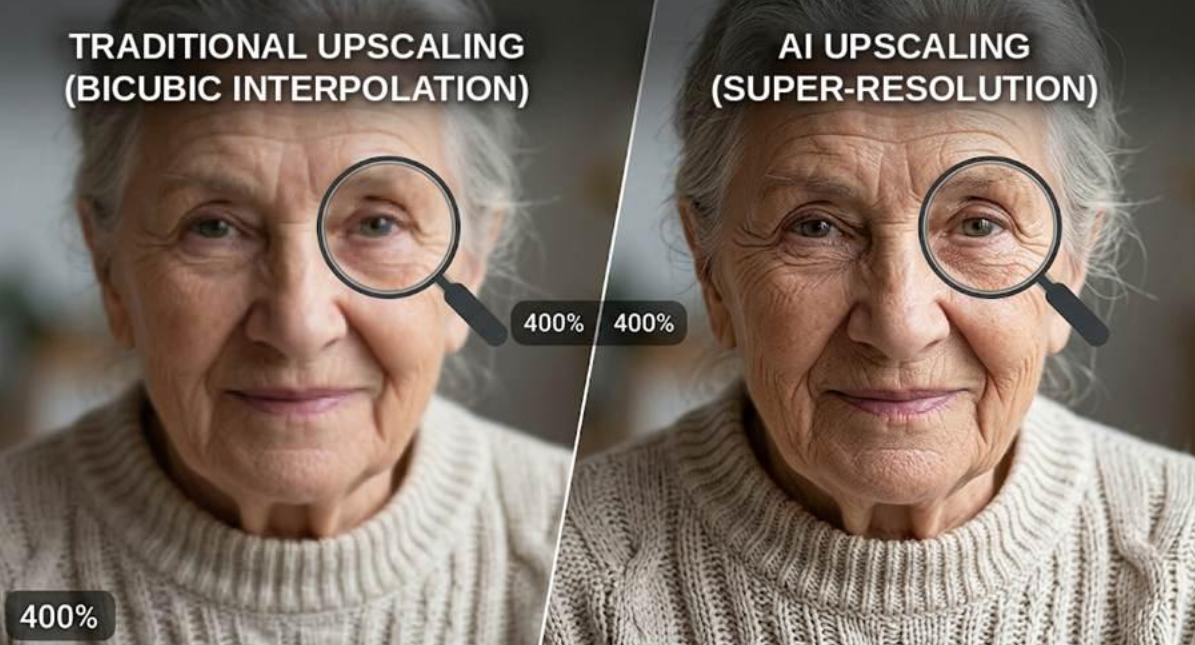
Upscaling used to just mean stretching an image bigger and hoping it still looked okay. It usually didn't. Every pixel got duplicated, not improved, bigger and blurrier at the same time. AI changed that math. A trained model predicts what detail plausibly belongs in the gaps instead of copying pixels around, which is how a 4x enlargement can actually hold up to printing or cropping. It's not just a "nice to have" feature. A photo pulled from an old phone backup. A screenshot someone sent you. An image saved off a website years back. These are usually smaller than what you actually need, and no manual editing brings back detail that was never captured to begin with.
Testing an upscaler is simple enough. Load a low-res photo, run it through, then zoom into the same spot at 100 percent. Clean edges and believable texture, skin, fabric, whatever, mean it's doing its job. Blurry or fake-looking repetitive patterns mean it isn't. Watch out for free-tier caps, too: a lot of these tools limit output size or how many images you get per day, and that's better to know before you commit to editing a whole batch.
Cleaning Up Noise and Grain Without Losing Detail

Try to fix grainy photos with old software and you'd end up blurring the whole thing to calm it down. Sharp bits went soft right along with the noise. Nobody had a way around that trade. AI denoisers found one, mostly because they don't treat a photo as one flat surface anymore. A speckled shot taken in a dark room still has hair, sweater fabric, maybe text on a poster behind someone's head, and the model can tell that apart from static now. It scrubs the static. The rest stays put.
Old phones in dim rooms cause this constantly, cranking the ISO until grain shows up as the cost of getting any exposure at all. There's a fix for the order things happen in, too, not just the tool itself: denoise before cropping, before upscaling, before color. Skip that and you end up trying to fix noise after it's already been baked into a bigger, brighter version of the same photo, which is a worse starting point than just doing things in order the first time.
Small Lighting and Color Fixes That Change Everything
Not every photo needs a dramatic edit. Half the time the only issue is a slight color cast from indoor lighting or shadows a bit too heavy on one side of a face. AI auto-correction has actually gotten decent at spotting that and nudging it back toward normal, none of the flat, plasticky look that old "auto-enhance" buttons always produced.
You notice this most in group photos and everyday snapshots, not staged portraits. A touch of warmth. Lift the shadows a little. Bump the contrast slightly. That's usually all it takes to turn a flat, forgettable shot into one worth keeping, and it happens in seconds instead of you manually wrestling curves and white balance.
A Five-Minute Workflow for Old or Low-Quality Photos
Stack these tools instead of running one at a time in isolation. Denoise first, grain throws off everything downstream. Unblur next, if the photo actually needs it. Upscale after that, once noise and blur are handled. Finish with a light color pass. Reverse the order, upscale something noisy and blurry first, and you just blow up every flaw and make it harder to fix.
This matters most for photos you'll never get to retake. An old family photo out of a physical album. A screenshot pulled from a video call. Something saved years ago, before phone cameras got decent. None of these get a second take, so squeezing out whatever real detail still exists is the only move left.
Common Mistakes People Make With AI Photo Tools

Mistake one: running every fix through a single general editor and expecting it to match a specialized tool at that one job. General editors are convenient, sure. But something built only to unblur, or only to denoise, or only to upscale, usually wins against a jack-of-all-trades app, because it was trained on exactly one problem instead of a dozen.
Mistake two: ignoring free-tier limits until they wreck your workflow mid-project. Resolution caps, file size limits, daily usage limits, most of these tools have at least one. Finding out halfway through a batch of photos is a lot more annoying than checking first.
Most people just say "bad photo quality" and leave it there, when it's really four separate problems wearing one name. That's the whole reason a general editor keeps stumbling where a handful of narrow tools don't. Try it backward once, upscale a grainy photo before denoising it, and you'll see why order matters. The grain just gets bigger along with everything else, and now it's harder to clean up than it was to begin with.
Automated Object Removal Without the Muddy Smudges
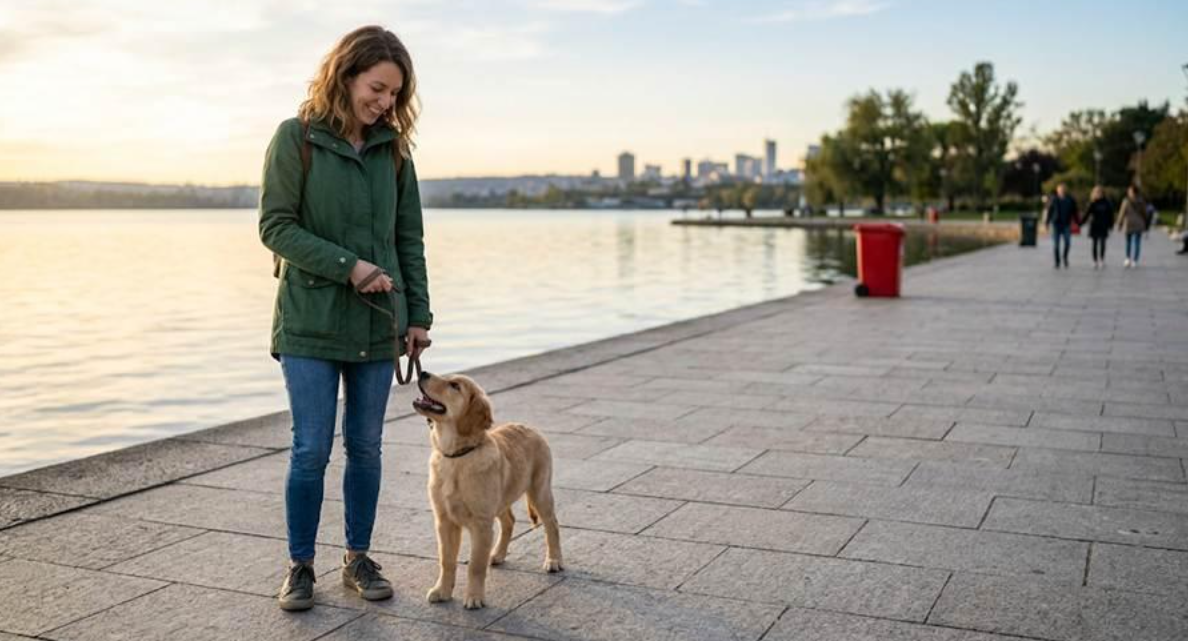
Beyond sharpness and light, countless good photos get ruined by background clutter: a stray shoulder at the edge of the frame, a photobomber, or a bright piece of trash taking focus away from the subject. Classic clone stamps and healing brushes forced you to manually paste adjacent textures over the flaw, usually leaving behind muddy, smeared patches that screamed "edited." Dedicated AI object removers approach the canvas differently. They analyze the geometry of the entire scene, understand light logic and perspective, and logically redraw the empty space as if the intruding object was never there in the first place.
Simulating True Depth and Natural Bokeh
Another quiet barrier between a flat phone snap and a professional frame is the lack of physical depth separation. Traditional editors only offer a uniform Gaussian blur that flattens the whole image and looks instantly artificial. Purpose-built AI depth tools, however, can construct an accurate depth map from a completely flat JPEG. By recognizing edge boundaries down to individual hair strands or fabric edges, they seamlessly push the background away, applying a progressive, lens-accurate bokeh that usually requires expensive wide-aperture glass to capture naturally.
Single-Task Efficiency Over Bloated Subscriptions
Shifting to a toolkit of lean, single-task utilities changes more than just the output quality—it completely changes how you approach editing. Instead of paying hefty monthly subscriptions for massive software suites where you use five percent of the features, most camera-roll problems can be solved in seconds with targeted micro-tools or light on-device AI models. It cuts the learning curve to zero, bypasses clutter, and reclaims photos that used to go straight to the trash.
Conclusion
The AI photo tools worth using rarely have the biggest ad budgets. The ones that nail one job, killing blur, recovering resolution, cutting noise, fixing light, tend to beat do-everything editors at the specific fix a photo actually needs. Next time something looks almost right but not quite, try one of these before writing the photo off.
Écrit par
Mavigadget
Tech & Gadgets, MaviGadget
Mavigadget écrit pour le Journal MaviGadget, testant les gadgets qui promettent de changer votre journée et rapportant honnêtement ceux qui le font réellement.


